We’ve all been there – powered through our lesson in record time, just to find an awkward 10 minutes left to fill! Or even had to adapt last-minute due to a sudden change in plans. So how can you turn a single image into an (interesting and educational) whole section of a lesson?
Observation questions
One simple approach is to ask your student to describe in more detail what they can see in the image. Let’s look at the following example image, taken from one of the puzzle slides of our Abridge Academy curriculum resources:
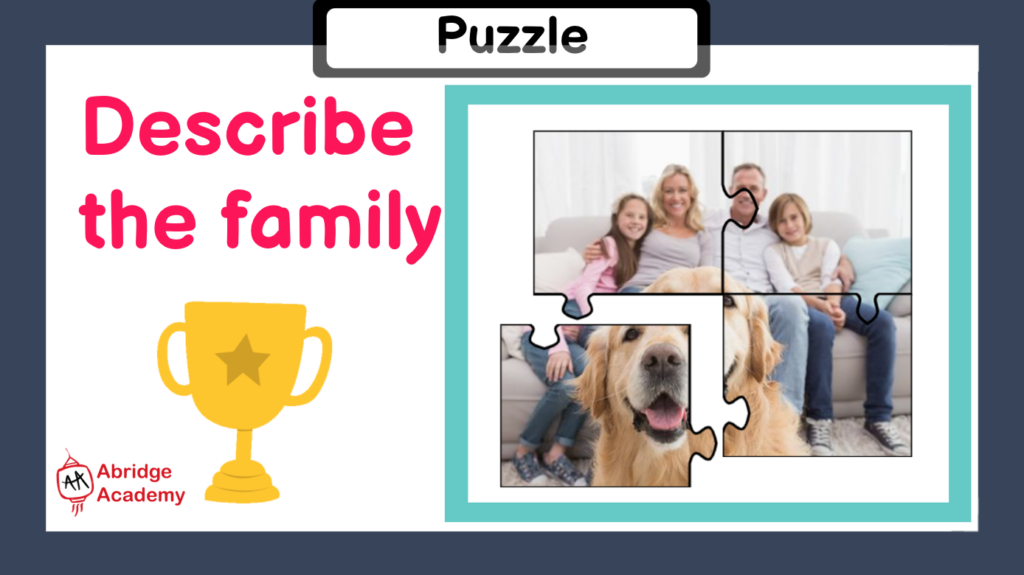
This lesson is aimed at beginner students, so simple questions are key. Here are some examples of questions you could ask:
- Who can you see?
- What animal is it?
- How many people can you see?
- What colour is the girl’s shirt?
- Where are they?
- What are they doing?
These questions typically start with “who”, “what” or “how many” and have simple answers which link to the content of the lesson. In this way, a simple picture can easily become a couple of minutes of discussion time.
Describe your situation
This is another approach which can extend the discussion even further from describing the picture itself, instead extending to ask the student about themselves too. For example (using the same image from above):
- How many people are in your family?
- Do you have a pet?
- What is your sister’s name?
- Is your brother older or younger than you?
- What do you do with your family?
In this way, you are using the picture as a prompt for further discussions more centred around your student and their life. These questions are still quite simple and should review or extend on the topic of the lesson or overall unit.
Imagine questions
Now let’s think about how you can expand a single picture into a longer discussion with upper beginner or lower intermediate students, using the example of the following lesson slide from our culture class on schools around the world:

The suggestions above may be a little too simple for them, but you can extend your conversation much further with more in-depth questions which require students to use their imagination more, such as:
- Do you think it is easy or difficult to study on a boat?
- If you went to this school, what would you like to learn?
- Let’s imagine you were the head teacher at a boat school. Where would you take your students?
- What do you think a day in the life of a student at this school would be like?
These questions typically include keywords like “if”, “think” and “imagine” – asking students to put themselves in the shoes of someone in the image and use their creativity to answer questions. This stretches their English more too, as they will need to use more extended sentences more independently, rather than relying on simple sentence structures taught during the class.
Make a story
Another way to extend the discussions around an image for intermediate students is to ask them to think beyond the picture and make up a story around it. Here is an example from our creative writing lesson slides (although you can use this for any interesting picture, not just in creative writing or storytelling classes!):
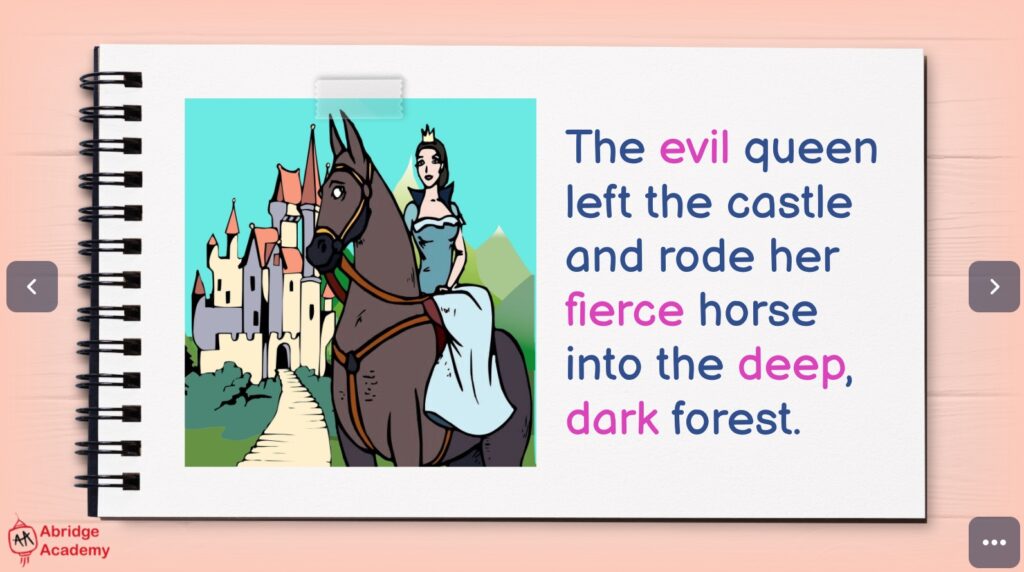
To encourage the student to create their own story around the image, you could ask:
- Who is the evil queen?
- Why did she leave the castle? What did she do there?
- Where is she going? Why?
- What do you think will happen in the deep, dark forest?
- Who will fight the evil queen?
In this way, you get the student to think about what may have happened before this image, and what could happen next. Encourage them to use their creativity and imagination to create their own story around a single image. You could even follow this up with tasks such as drawing a storyboard or writing a section of the story using key literary techniques taught in the class.
Explain questions
A final approach, great for more advanced students, is to ask them to explain the image – using “why” or “how” questions. Let’s look at an example slide from our science boost lessons (aimed at advanced English learners):
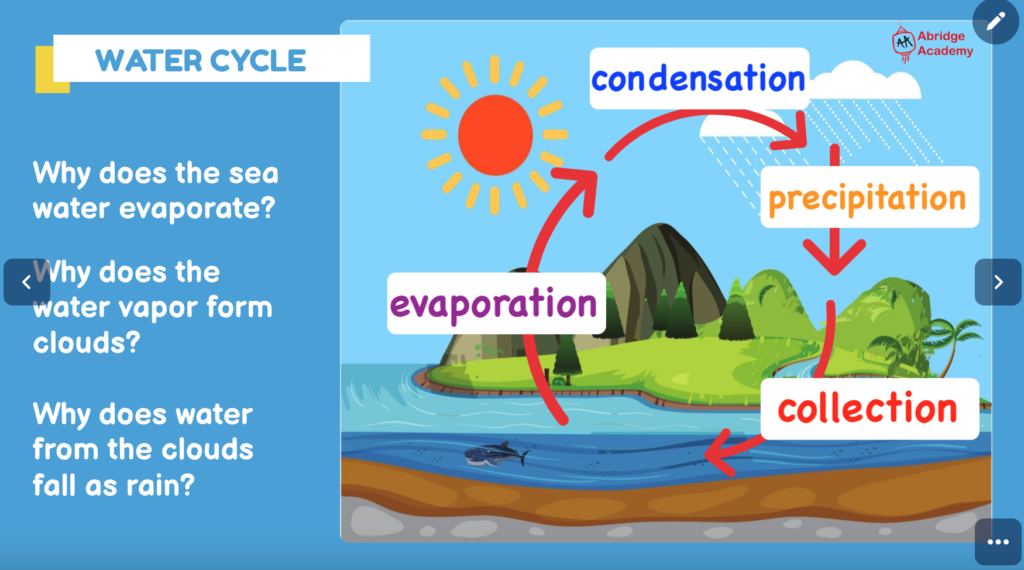
We can see that the student has already annotated the slides with the key words, but we could easily extend this into a longer discussion by asking questions such as:
- Why does the sea water evaporate?
- Sea water is salty. Why isn’t rain salty?
- Why does the water form clouds?
- What causes the water droplets to fall as rain?
- What is the difference between condensation and precipitation?
- How does the water return to the sea?
- Does water only evaporate from the sea?
- Why is the water cycle so important for life on land?
In this way, a simple diagram or image can become an extended discussion explaining the reasoning or science behind the picture. This is great practice for more advanced students, particularly if they would like to improve their scientific language and ability to talk about scientific concepts in English.
Summary
So there you have it – five ways to turn a single picture into an extended discussion or whole section of a lesson, with minimum preparation required! Do you have any additional suggestions to share? Feel free to comment in the discussion below!